For marketing, developer relations, and documentation teams, producing consistent content is a constant challenge. The process is often fragmented: ideas languish in spreadsheets, drafts get stuck in email threads, and final publishing is a manual chore. This not only drains creative energy but also introduces errors and delays. The core business problem isn’t a lack of ideas—it’s the inefficient, manual system (or lack thereof) for managing them.
The technical requirements for a solution are clear: it must be triggered automatically (e.g., by a schedule or event), orchestrate multiple tools (for creation, review, formatting), enforce approval workflows, and publish without manual intervention. Most importantly, it must be reliable, observable, and built with interchangeable parts to avoid vendor lock-in.
A Blueprint for Self-Sustaining Content
The answer is a purpose-built automation pipeline. Think of it not as a single tool, but as a connected system of specialized services, glued together by a central controller. This approach moves you from manual, sequential tasks to a parallel, event-driven model.
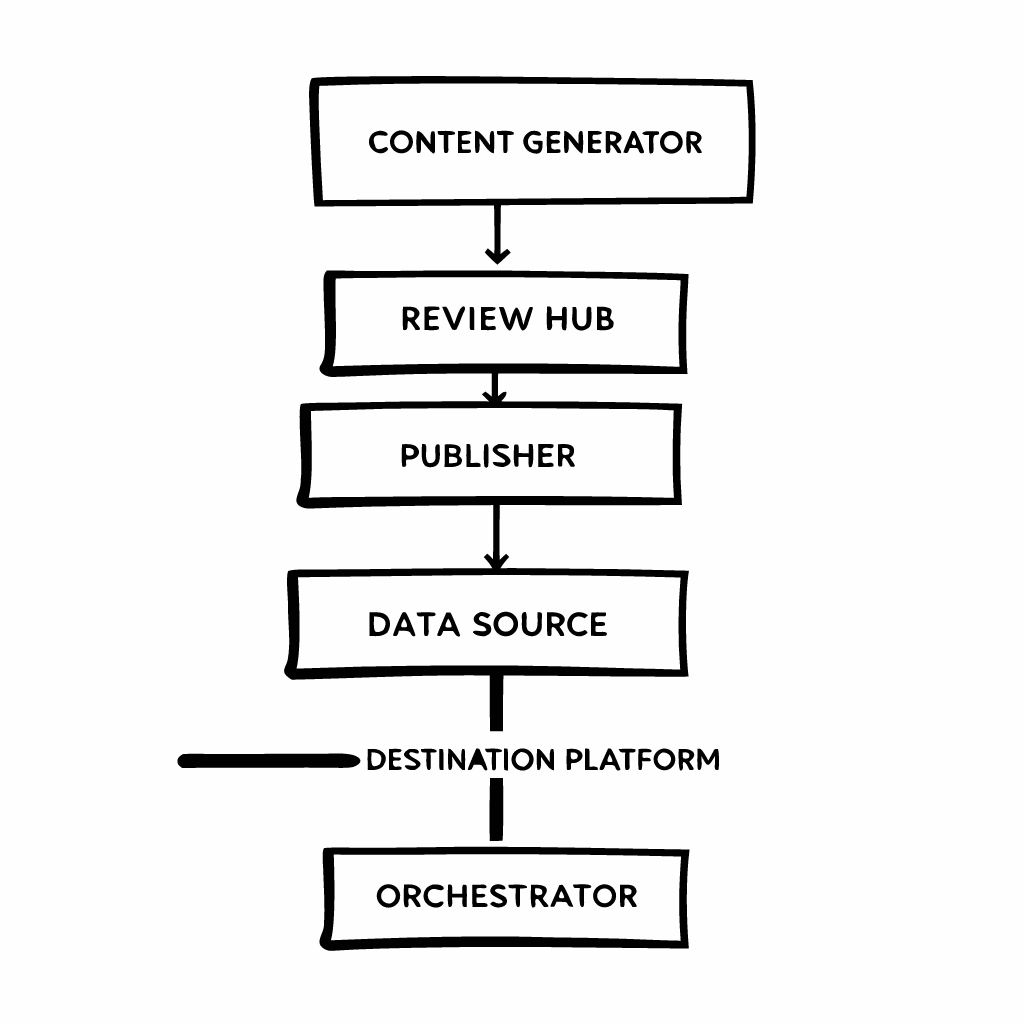
The architecture is deliberately layered. At the top, an Orchestrator (like a workflow engine or even carefully configured CI/CD tool) is the brain. It doesn’t create content itself; it directs traffic. The middle layer contains the specialized workers: the Content Generator, the Review Hub, and the Publisher. The bottom layer holds your Data Sources (like a CMS or Airtable) and Destination Platforms (like WordPress, Shopify, or LinkedIn). The orchestrator fetches instructions from the source, then passes the baton through each middle-layer service until the job is done.
Mapping the Step-by-Step Workflow
Let’s walk through what happens once the pipeline is triggered. A practical, production-ready flow typically has six key stages.

- Trigger: Everything starts automatically. This could be a cron job running every Monday at 9 AM, a webhook from a project management tool when a task is marked “Ready,” or a new row added to a database.
- Create: The orchestrator calls your chosen content generation service. It passes along key data (topic, keywords, tone) and receives a structured draft (like a JSON or Markdown file). This stage is where AI writing assistants or template engines can be integrated seamlessly.
- Review: The draft doesn’t go live. Instead, it’s routed to a review system. This could create a pull request in Git, a draft in a collaborative editor, or a task in your team’s chat platform. The pipeline pauses here, waiting for a human or an automated approval (e.g., a sentiment check) to signal continuation.
- Format & Enrich: Once approved, the content is transformed. This stage might convert Markdown to HTML, inject tracking codes, resize and upload images to a CDN, or translate the piece into other languages. It’s about making the content platform-ready.
- Publish: The formatted content is delivered via the destination platform’s API. This could mean scheduling a blog post, posting a social update, or updating a product description. The orchestrator handles authentication and error logging.
- Analyze & Loop: After publishing, the pipeline isn’t finished. It can fetch initial performance data (views, clicks) and log it. This creates a feedback loop, informing future content decisions and closing the automation circle.
Connecting the Dots: The Power of Integration
The magic of this pipeline lies in its connections. Each component is a standalone service communicating through APIs and webhooks. This makes the system resilient and adaptable.
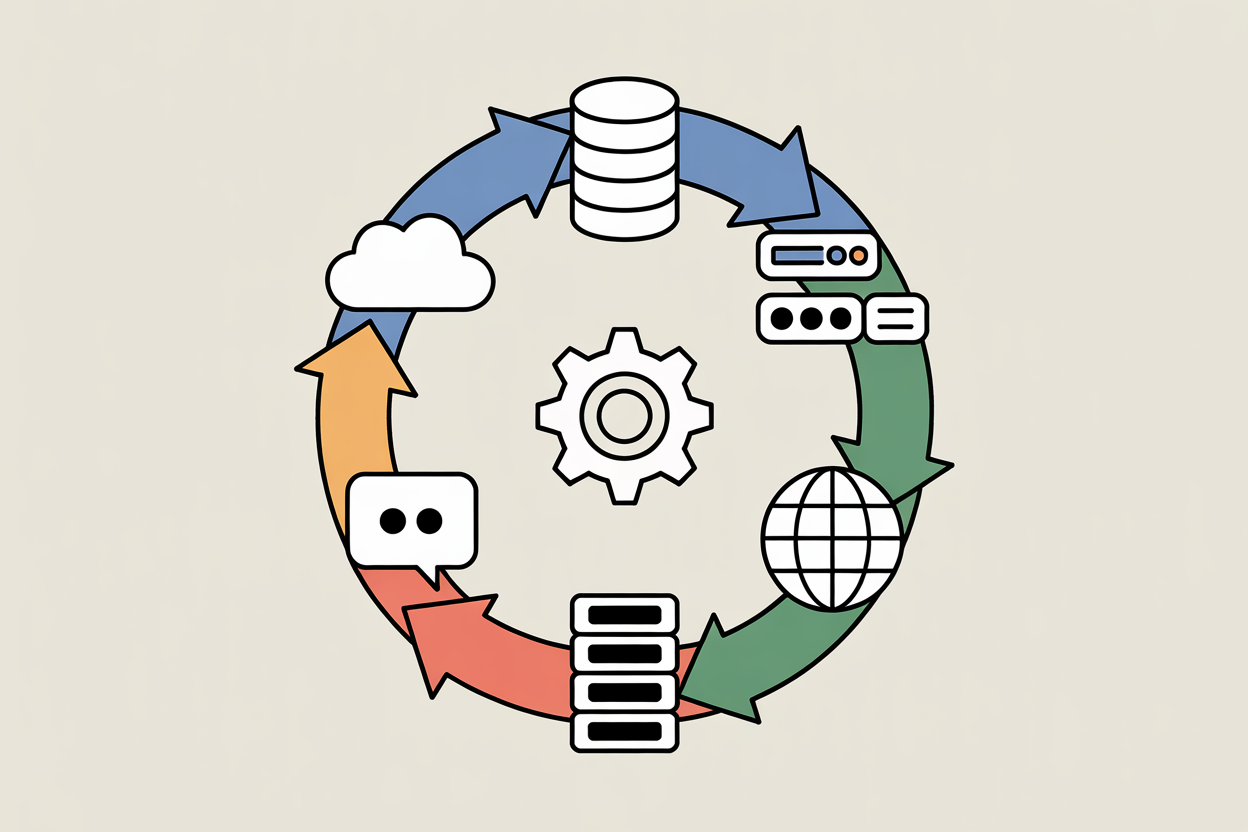
Your Pipeline Core (the orchestrator and workers) becomes a hub. It pulls briefs and schedules from a Cloud Database. It might send review notifications to a Chat/Collaboration app. It fetches assets from a Digital Asset Management server. Finally, it publishes to the Public Web. By designing with APIs in mind, you can swap out any component—replace your CMS, change your review tool, add a new social media destination—without rebuilding the entire pipeline.
Getting Started: Your Implementation Checklist
Building this might seem daunting, but you can start small and evolve.
- Define Your Minimum Viable Pipeline (MVP): Start with one trigger, one content type, and one destination. Automating a single weekly social media post is a perfect first win.
- Choose Your Orchestrator: Options range from no-code platforms like Zapier or Make to more developer-centric tools like n8n, or even GitHub Actions. Pick one that matches your team’s skills.
- Decouple Your Services: Even within your orchestrator, design each step as a discrete module. This makes testing and debugging far easier.
- Implement Observability: From day one, ensure every step logs its actions and errors to a central dashboard. You need to know when the pipeline fails and why.
- Prioritize the Human-in-the-Loop: Always include a review gate before publishing. Full automation is the goal, but human oversight is a necessary safety net.
By shifting your perspective from managing content to managing a content system, you free your team from repetitive tasks. The initial investment in building this pipeline pays continuous dividends in consistency, scale, and the ability to focus on strategy and creativity, not copy-pasting and clicking “publish.” Start by mapping your current, manual process, then identify the first loop you can close automatically.